Who It Suits
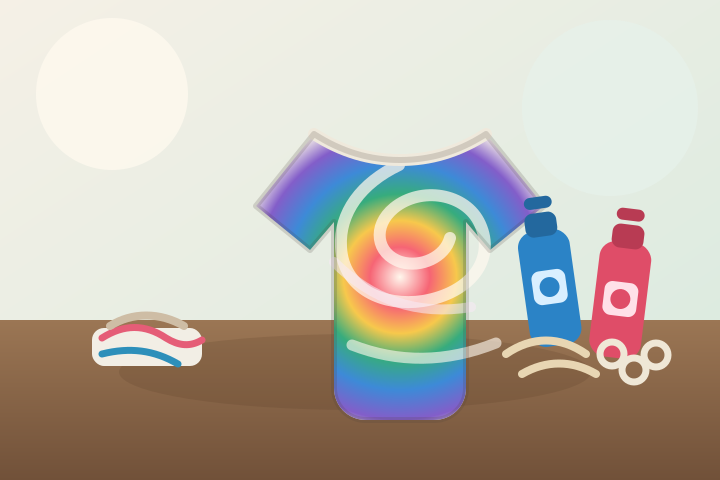
Tie-dyeing is a form of resist dyeing: you fold, twist, or bind fabric so that some areas are blocked from the dye, apply the dye, and then unbind the fabric so the blocked areas stay lighter and a pattern appears. A beginner’s first session is usually one plain cotton T-shirt, a few colours of dye, and rubber bands — twist the shirt into a spiral, secure it, apply two or three colours, let it sit for about a day, then rinse it out and see what the pattern opens into.
It suits people who like colour, quick visual experiments, and practical projects that can become clothing, gifts, or home textiles. The honest appeal is that it is cheap, needs no fine motor skill or specialist tools, and produces a finished, wearable piece within a day or two. The honest constraints are that it is messy and staining, it needs water and somewhere to rinse, the dye needs roughly 24 hours to develop, and the result is partly unpredictable — the pattern only appears when you rinse, and no two pieces come out identical.
Resist dyeing is one of the oldest textile techniques: the V&A’s collection includes Japanese shibori (tied resist) kimono from the 1800s, and in the West the technique became widely known through the bright shirts of 1960s and 1970s counterculture.
Key Terms
A few words do most of the work in tie-dyeing:
- Resist — anything that keeps dye out of part of the fabric: rubber bands, string, folds, stitches, or clamps. The pattern is made by the resist, not by drawing.
- Fibre-reactive dye — a dye (Procion-type) that forms a chemical bond with cellulose fibres: cotton, rayon, linen, hemp, and bamboo. This is the standard dye for most tie-dyeing.
- Acid dye — a dye for protein fibres: silk, wool, and nylon. Used for tie-dyed silk scarves or wool.
- Soda ash — sodium carbonate, dissolved in water and used to pre-treat fabric before applying fibre-reactive dye. It raises the fabric’s pH so the dye bonds properly. Many beginner kits include a pre-treatment or pre-treated fabric instead.
- Batching — letting dyed fabric rest in a warm, humid place (usually sealed in plastic) for around 24 hours so the dye develops.
- Spiral, bullseye, stripes, scrunch — the four basic beginner patterns: gather the shirt into a spiral and band it (spiral), fold it into a circle from the centre (bullseye), fold it into an accordion (stripes), or crumple it randomly (scrunch).
- Shibori — a Japanese family of resist techniques using folding, stitching, clamping, and pole-wrapping.
- Ice dyeing — placing dye on ice cubes laid over wet fabric and letting them melt, which produces soft, watercolour-like gradients.
- Discharge — chemically removing colour from dyed fabric to create white or lighter areas. An advanced technique.
- Mordant — a substance, often a metal salt, used to help natural dyes bond to fabric.
Getting Started
The smallest sensible first project is one plain 100% cotton T-shirt dyed in a spiral pattern. Two decisions matter before you buy anything:
- Fibre first. Check the fabric label. Fibre-reactive dyes work on cellulose fibres (cotton, rayon, linen, hemp, bamboo) and not on polyester or other synthetics; silk and wool need acid dyes. If you are dyeing a favourite shirt, the fibre content decides which dye to use, and a cotton-polyester blend will come out pale.
- Kit or individual dyes. A beginner kit (dyes, squeeze bottles, gloves, and sometimes pre-treatment) is the cheapest way to try the hobby. Individual fibre-reactive dyes cost more per colour but give you more colour choices and can be reused across many projects.
Wash new fabric before dyeing to remove the finishes and sizing that can block the dye.
Basic Gear
Essential:
- Plain 100% cotton shirt, tote bag, bandana, or fabric square.
- Fibre-reactive dye or a beginner tie-dye kit.
- Squeeze bottles, one per colour.
- Rubber bands or string.
- Gloves and an apron or old clothes.
- Plastic tray, rack, or covered table.
- Plastic bags or wrap for batching the dyed fabric.
- Mild detergent for washing finished pieces.
Optional at first:
- Soda ash, if your kit does not include a pre-treatment.
- A bucket or tub for rinsing.
- A small scale for measuring dye and soda ash.
- Extra colours, larger bottles, and batching supplies as you continue.
First Session
A first spiral on a cotton T-shirt, step by step:
- Wash the shirt and let it dry.
- Lay it flat, pinch the centre, and twist it into a flat spiral. Secure it with rubber bands at regular intervals.
- Wet the bundle thoroughly — damp fabric takes dye more evenly than dry fabric.
- Apply two or three colours, working from the centre outwards or in alternating sections.
- Seal the bundle in a plastic bag and batch it for around 24 hours in a warm place.
- Rinse under running water, starting cold and moving to warm, until the water runs mostly clear.
- Unbind, air dry, then wash separately with mild detergent.
The active work takes about an hour; the rest is waiting. The goal of the first session is to learn how much dye the fabric absorbs, how the bands hold up, and how the pattern opens after rinsing — not to make a perfect shirt.
First Month
Spend the first month repeating the four basic patterns instead of trying every technique at once:
| Pattern | How it is made | What you are learning |
|---|---|---|
| Spiral | Gather into a spiral, band it | Colour placement and band spacing. |
| Bullseye | Fold into a circle from the centre | Concentric rings and colour order. |
| Stripes | Fold into an accordion, band down the middle | Sharp versus soft edges. |
| Scrunch | Crumple randomly | Loose versus tight scrunching. |
Test colour pairs, white space, tighter binding, looser scrunching, and different fabric weights. Photograph each bundle before rinsing so you can connect the folded shape with the final result. Once the basics feel comfortable, try ice dyeing for softer gradients or a stitched shibori pattern.
Costs
Tie-dyeing is inexpensive to start. A beginner kit is typically around US$10–30 (UK listings are often £10–25), and a few plain cotton items, gloves, rubber bands, and squeeze bottles are enough for several projects. Individual fibre-reactive dyes usually cost a few dollars per colour, and one small batch can dye several items. Prices vary by region and change over time, so check current listings before budgeting.
Costs rise if you buy premium blanks, many dye colours, larger tubs, soda ash, batching supplies, or enough fabric for group sessions.
Lower-cost routes exist: use old cotton clothes you no longer wear, start with small items such as bandanas or fabric squares, and look for local workshops or makerspace classes that provide materials.
Space Needed
Small projects fit on a kitchen table, patio table, utility counter, or washable floor area. The important part is containment: dyes can stain surfaces, grout, clothes, and towels, and wet floors are slippery. You also need a place for damp fabric to sit undisturbed while the dye develops, and a sink, tub, or outdoor tap for rinsing. Many people dye and rinse outdoors for exactly this reason.
Solo or Social
Tie-dyeing works well alone, but it is also a strong group craft. Parties, summer camps, family weekends, workshops, school events, and maker groups can all use the same basic setup if there is enough table space, supervision, and cleanup planning. Dye workshops are a common offering at community centres, makerspaces, and craft stores, and they are a low-cost way to try the hobby before buying your own kit.
Common Mistakes
- Dyeing polyester-heavy fabric and getting pale results.
- Skipping the pre-wash, so finishes on new fabric block the dye.
- Skipping the soda ash pre-treatment when using individual fibre-reactive dyes.
- Using too many colours until everything turns muddy.
- Leaving fabric too dry for the dye to spread.
- Binding so loosely that the pattern disappears.
- Rinsing one piece while another is still in the same water, cross-dyeing it.
- Washing finished pieces with other laundry too soon — the first one or two washes should be separate.
Safety / Accessibility
Dye powders, soda ash, wet floors, staining, and repetitive squeezing are the main concerns. Wear gloves, avoid breathing dry dye powder (mix powders gently, outdoors or in a well-ventilated area where possible), protect surfaces, label containers, and follow the dye manufacturer’s instructions for mixing, batching, rinsing, and disposal. The safety data sheet (SDS) that comes with your specific dye is the authoritative source for handling and disposal, so read it before your first session.
For children, use kits labelled for home or family use, supervise mixing and rinsing, and keep dye powder out of reach.
Tie-dyeing is fairly accessible: it can be done seated, pre-folded blanks and larger squeeze bottles help with limited hand strength, and outdoor rinsing removes the need for a dedicated indoor setup.
Where It Can Go
Tie-dyeing can lead toward ice dyeing, shibori, natural dyeing, batik, fabric painting, screen printing, garment upcycling, quilting fabric design, festival clothing, small-batch selling, or custom team and event shirts. Natural dyeing — getting colour from plants, insects, and minerals — is a natural next step if you are curious about where dye comes from.
References
Last reviewed: 18 August 2026.
This guide covers beginner tie-dyeing with commercial dyes on natural fibres. It is not a substitute for the safety data sheet of the specific dye you buy.
Public institution:
- V&A Collections: shibori for the long history of Japanese resist-dyed textiles, including shibori kimono from the 1800s.
Specialist guides:
- Dharma Trading Learning Hub for tie-dye, ice dyeing, and natural dyeing techniques, and for choosing dyes by fibre type (cellulose versus protein fibres).
- iDye: Tie-Dye for beginner tie-dye kits and dyes from a US dye brand.
Community resources (optional):
- r/tiedye for pattern ideas, troubleshooting, and work-in-progress feedback — treat advice as practical context, not safety authority.
Related Hobbies
Sewing, quilting, embroidery, weaving, natural dyeing, candle making, soap making, painting, printmaking, and photography all connect well with tie-dyeing because they share colour planning, materials, and handmade presentation.