Who It Suits
Wood burning suits people who like drawing, patient hand control, natural materials, and warm handmade objects. It is a good fit if you enjoy sketching, lettering, wood crafts, folk art, ornaments, signs, or decorative gifts.
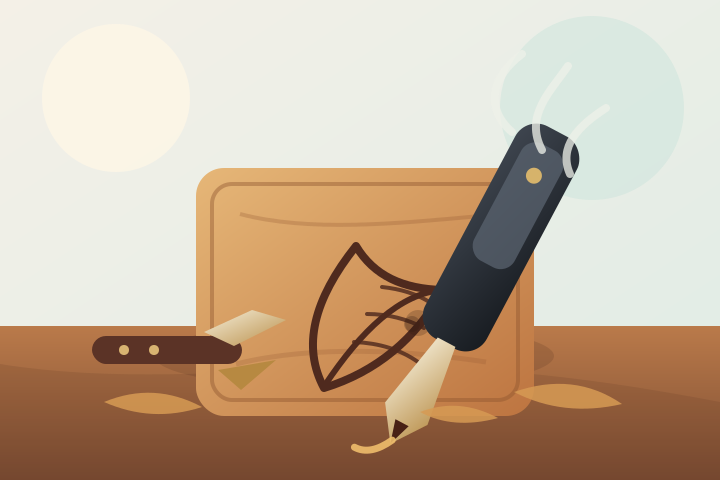
What you actually do: hold a heated pen against a piece of wood and let controlled heat brown the surface — no cutting, no glue, just heat, speed, and pressure. A typical beginner session is sanding a small blank smooth, transferring a simple outline, practising lines and dots on scrap, and burning one small shape such as a leaf, a tag, or an initial. The appeal is concrete: the mark appears the moment the tip touches the wood, the palette is the wood itself (light tan to deep brown), and the finished object is a real piece of wood you can hold. The honest constraints: the tip is hot enough to burn skin and can start a fire if left on fabric or paper; smoke and fumes mean you need ventilation; and shading — the skill that separates flat line work from finished art — takes real repetition.
Getting Started
There are two tool routes, and the difference matters:
- Adjustable-temperature pen — the usual starting point. You can run the tip cooler for light lines and warmer for dark shading, and one pen handles most beginner work.
- Fixed-temperature pen or multi-tip station — cheaper entry pens are often fixed-temperature, which limits how light you can burn; bench stations with several tips at once are a later upgrade for people who do a lot of shading.
Start with clean, untreated, light wood. Basswood (lime), birch, poplar, and pale plywood blanks are common beginner choices because the grain is fine and even, so the burn reads clearly. Avoid painted, stained, varnished, or pressure-treated wood: besides burning unpredictably, heated treated wood gives off fumes you do not want to breathe.
A classic first project is a small tag or coaster with one outlined shape — a leaf, a star, or an initial — on a 10–15 cm (4–6 inch) blank. It is small enough to finish in one session and big enough to practise line work, dots, and a little shading.
Basic Gear
Essentials:
- An adjustable-temperature wood burning pen (a fixed-temperature pen works to start but limits light tones).
- A point or cone tip for lines and lettering, and a shading tip for broader tones.
- Untreated light wood: basswood, birch, poplar, or pale plywood blanks.
- Pencil, eraser, ruler, and carbon or tracing paper for transferring a design.
- Fine sandpaper for smoothing the surface before burning.
- A heat-safe stand for the pen between strokes and after the session.
Optional at first: extra tips (ball, wheel, wick), a magnifier, clamps or a small vise to hold the blank, a dust mask for sanding, and a finish such as wax, oil, or clear varnish to seal the piece.
First Session
Use the first session to learn how the pen responds to speed, pressure, temperature, and grain direction — not to finish a project. Make a practice sheet on scrap: straight lines at different speeds, dots (stippling), short crosshatching, and a gradient from light to dark built from overlapping strokes. Notice how the same tip burns lighter when moved fast and darker when held slow. Then burn one small shape, such as a leaf, star, initial, coaster, or tag, instead of starting with a large detailed portrait.
First Month
Spend the first month repeating small designs and learning how different woods behave. Keep a few test scraps labelled with wood type, tip shape, temperature setting, and finish. Try one lettering project, one shaded design, and one pattern-based piece so you build control without relying on only one technique.
The vocabulary that does most of the work:
- Pyrography — the formal name for wood burning, from the Greek for “fire writing.”
- Stippling — building tone from many small dots; the main way beginners create shading without smudging.
- Crosshatching — overlapping sets of parallel lines to build darker, even tone.
- Shading / gradient — a smooth transition from light to dark, built from lines or dots of increasing density.
- Point (cone) tip — a fine tip for outlines, lettering, and detail.
- Shading (wick) tip — a broader tip for filling areas and soft tones.
- Blank — a piece of wood prepared for burning, usually bought pre-cut and sanded.
- Scorching — deliberately burning a broad, dark area, often as a background.
Costs
Wood burning can start cheaply, and the honest way to budget is by route (prices vary a lot by region and change over time, so check current listings before budgeting):
- Home route: a basic adjustable-temperature pen runs roughly US$20–60, extra tips a few dollars each, and small blanks a few dollars each. Sandpaper, a stand, and a simple finish add little.
- Class route: a beginner workshop or class, where tools and wood are often provided, typically costs roughly US$30–100, varying a lot by region and venue.
Costs rise with multi-tip stations, specialist tips, higher-quality wood, transfer tools, clamps, masks, and larger display pieces. Lower-cost routes exist: offcuts and scrap wood are free for practice, maker spaces and craft groups share tools, and used pens are widely available.
Space Needed
Small projects need only a clear table, good lighting, a protected surface, and ventilation. The hot pen needs a stable stand and a safe place to cool, and the work area should be kept clear of paper, fabric, and other flammables. Wood dust from sanding and smoke from burning make it worth keeping food away and working where the air can move — near an open window or under a fan is a common setup.
Solo or Social
Wood burning is usually a quiet solo hobby, but classes, craft groups, maker spaces, and local pyrography clubs and associations make it social. Feedback from other makers is especially useful for lettering, shading, and choosing wood that burns evenly. Local craft fairs and makers’ markets are a common place to see work at different levels and to sell small pieces.
Common Mistakes
- Burning treated, painted, stained, or unknown wood.
- Pressing too hard instead of letting heat and speed do the work.
- Starting on the final piece before testing the tip and temperature on scrap.
- Holding the pen in one place until the mark becomes blotchy or scorched.
- Forgetting that different grain areas burn at different speeds.
- Leaving the hot pen on the work surface or on fabric while you think.
- Applying finish before the piece is fully clean and cool.
Safety / Accessibility
The main hazards are the hot tip, smoke and fumes, and wood dust from sanding. OSHA’s woodworking hazards page lists wood dust and finishing chemicals among the main health hazards of working with wood, and its general guidance on personal protective equipment covers the basic protections that apply here.
- Burns — the tip is hot enough to burn skin quickly, and it stays hot after you switch the pen off. Keep it in its stand between strokes, never rest it on the workpiece, and let it cool before changing tips or storing it.
- Fire — keep the work area clear of paper, fabric, and other flammables, and never leave a hot pen unattended.
- Smoke and fumes — burning wood produces smoke, and heated treated, painted, or stained wood gives off fumes you should not breathe. Work in a ventilated space, and use only clean, untreated wood.
- Dust — sanding produces fine wood dust, which OSHA lists as a health hazard. Vacuum or brush rather than blow it away, and use a dust mask when sanding.
- Eyes — sanding can throw fine particles; OSHA requires eye protection where flying particles are a hazard (29 CFR 1910.133).
- Age — the tool is genuinely hot; this is generally a teen-to-adult activity, and younger participants should burn with close supervision, instruction, and simple projects.
People with hand strain can try larger-grip pens, clamps to hold the blank, shorter sessions, pre-sanded blanks, and magnification.
Where It Can Go
Wood burning can lead toward decorative signs, ornaments, portrait pyrography, lettering, patterned boxes, jewellery, furniture accents, mixed-media art, decoration for wood carving, leather pyrography, craft fairs, or personalised gifts. Portrait pyrography — building a face from fine lines and shading — is the hobby’s advanced end and takes well beyond a first month of practice.
References
Last reviewed: 17 August 2026.
Official safety sources:
- OSHA: Woodworking — the official safety entry point for woodworking hazards.
- OSHA: Woodworking — Hazards and Solutions — health hazards of working with wood, including wood dust and finishing chemicals.
- OSHA: Personal Protective Equipment — the general PPE requirements (eye/face, hand, respiratory) that apply to burning and sanding.
- OSHA 1910.133: Eye and face protection — when eye and face protection is required against flying particles such as sanding dust.
Related Hobbies
Wood carving, woodworking, drawing, calligraphy, painting, leatherworking, stained glass, model making, and printmaking all sit nearby — they share careful hand control, line work, and finishing work.