Who It Suits
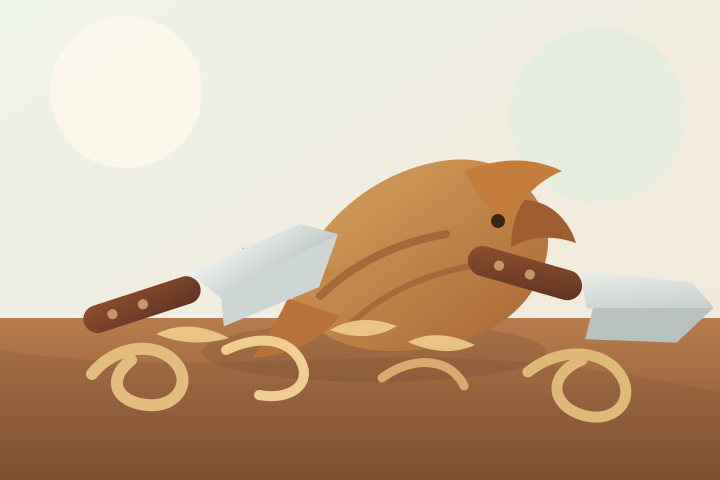
Wood carving suits people who like quiet handwork, natural materials, and visible progress from small controlled cuts. It is a good fit if you enjoy drawing, sculpture, folk craft, model making, or practical objects such as spoons and handles.
What you actually do: hold a piece of wood and remove small amounts of it with a knife or gouge, following the grain. A typical beginner session is stropping the knife, making a few controlled practice cuts on scrap, and working on a simple shape — rounding a comfort bird, hollowing a spoon bowl, or cutting a relief outline. The appeal is concrete: the material responds immediately, shavings curl away, and the object is visibly made by your hands. The honest constraints: the tools are sharp and careless cuts do cause real injuries, so hand position and grain awareness matter from the first session; knife control takes repetition, so early progress is slow; and wood choice matters more than most beginners expect.
Getting Started
There are two main routes, and it is worth knowing which one you are starting:
- Dry carving — the wood is already seasoned (kiln-dried or air-dried) and stable. This is the usual starting point: the wood behaves predictably, blanks are cheap and widely sold, and the work can be done any time of year.
- Green carving — the wood is freshly cut and still wet. This is the traditional route for spoons, handles, and other utensils: the wood is softer and easier to cut, but it shrinks and can split as it dries, so the design has to allow for movement.
Start with instruction before buying a full tool set. A class, club session, or workshop teaches knife control, grain reading, and sharpening much faster than trial and error, and it is the safest way to learn because an instructor can correct hand position before bad habits set in. If you learn on your own, start with one knife and soft wood, and keep the first projects simple.
A classic first project is the comfort bird: a small, rounded bird figure with a smooth body, a simple beak, and no fine detail. It is a standard first project in many carving courses because it teaches rounding, knife control, and grain direction in one object. A spoon blank or a small relief tile are good alternatives.
Basic Gear
Essentials:
- A carving knife or detail knife — a straight, sharp blade that handles most beginner cuts.
- A cut-resistant glove — worn on the hand that holds the work, never on the cutting hand. A thumb guard is a lighter alternative.
- Soft, straight-grained wood: basswood (lime), clear pine, or butternut. Avoid knotty or figured wood until you understand how grain behaves.
- A pencil for layout marks.
- A strop and abrasive compound — a leather strip and a fine abrasive paste for keeping the edge sharp between sessions.
- Sandpaper or small files.
- A simple finish such as oil, wax, or paint.
Optional at first: gouges (curved-blade tools for hollowing and rounding), a mallet, a bench hook or carving jack to hold the work, a vise, and sharpening stones. A full set of gouges is a later purchase, not a first one.
First Session
Use the first session to make controlled cuts on scrap wood, not to finish a project. Practice cutting with the grain, slicing across end grain, rounding an edge, and stopping before the blade reaches your supporting hand. Strop the knife before you start — a sharp edge removes wood with almost no pressure, and that is the whole point. If you start a project, choose a block with generous margins and remove less wood than you think you need.
First Month
Spend the first month repeating small shapes and learning how sharp tools behave. Make a few simple figures or utensils, keep the first attempts for comparison, and sharpen or strop often. Skill grows faster from clean repeated cuts than from forcing a complex design too early.
The vocabulary that does most of the work:
- Grain — the direction of the wood fibres. Cuts that follow the grain come away clean; cuts that cross it tear and split. Reading the grain is the single most important skill in carving.
- Gouge — a curved-blade tool for hollowing, rounding, and scooping. Gouges come in many widths and curves.
- Relief carving — carving a design in raised form on a flat board, from shallow (low relief) to nearly free-standing (high relief).
- Chip carving — a decorative technique of small V-shaped cuts, traditionally used on furniture, boxes, and spoons.
- Whittling — freehand carving with a knife, usually of simple figures and shapes; the closest cousin to beginner carving.
- Green carving — carving freshly cut, still-wet wood, the traditional route for spoons and handles.
- Blank — a piece of wood prepared for carving, usually bought pre-cut.
- End grain — the cut face of the fibres, where the grain runs toward you; it cuts differently and is where beginners most often tear the wood.
- Strop and compound — a leather strop with a fine abrasive paste, used to keep an edge sharp between sessions.
- Bench hook / carving jack — simple devices that hold the workpiece steady so you do not have to grip it with bare hands.
Costs
Wood carving can start cheaply, and the honest way to budget is by route (prices vary a lot by region and change over time, so check current listings before budgeting):
- Class route (recommended first): a single beginner class or workshop typically costs roughly US$50–150, varying a lot by region and venue, and usually includes tools and wood.
- Home route: a good beginner carving knife runs roughly US$30–80, a cut-resistant glove US$10–30, a strop and compound US$10–30, and a few blanks a few dollars each. A full set of gouges is roughly US$100–300 or more, and mallets, jacks, clamps, and sharpening stones add more.
Costs rise with power carving tools, specialty woods, and larger sculpture work. Lower-cost routes exist: offcuts and scrap wood are free, pre-cut blanks are cheap, clubs and maker spaces share tools, and used carving tools are widely available.
Space Needed
Small carving projects need only a well-lit table, a protected surface (an old board or carving mat), and a way to collect chips. Relief carving and larger work benefit from a bench, clamp, or carving vise. Dust is lower than in power-tool woodworking, but shavings and sanding residue still need cleanup.
Solo or Social
Wood carving is usually a solo hobby, but it is best learned with other people around. Clubs, classes, carving circles, and online pattern communities help beginners learn safe habits, read the grain, and sharpen an edge. Seeing how another carver holds the tool and recovers from a bad cut can save a lot of frustration. National carving associations (for example, the American Woodcarvers Association and the Woodcarving Institute in the US) and spoon carving guilds run classes, exhibitions, and pattern libraries that are a common next step after the first few projects.
Common Mistakes
- Starting with hard, knotty, or unpredictable wood.
- Using a dull blade and pushing too hard.
- Cutting toward fingers or into an unstable grip.
- Gripping the work with bare fingers in the line of the blade.
- Buying a large set of tools before learning one knife well.
- Trying relief carving or a large figure before knife control is reliable.
- Sanding away form instead of making cleaner cuts.
Safety / Accessibility
Sharp tools are safer than dull ones, but they still demand deliberate hand position, clear lighting, and a stable workpiece. OSHA notes that woodworking operations are hazardous “particularly when machines are used improperly or without proper safeguards,” and lists laceration, amputation, severed fingers, and blindness among common injuries from woodworking equipment, with wood dust and finishing chemicals as the main health hazards. Its guidance on hand and power tools (OSHA Publication 3080, referenced on the woodworking hazards page) covers the basic safety procedures for hand tools.
- Hand position — keep the non-cutting hand out of the line of the blade. A cut-resistant glove on the hand holding the work, or a thumb guard, is the standard protection; it is not a substitute for keeping fingers clear.
- Secure the work — use a bench hook, carving jack, or vise instead of gripping the workpiece tightly with bare hands.
- Eye protection — chips and shavings can fly, especially with mallet work or power carving. OSHA requires eye and face protection where flying particles are a hazard (29 CFR 1910.133).
- Dust — hand carving produces less dust than power woodworking, but sanding produces fine dust, which OSHA lists as a health hazard. Work in a ventilated space, vacuum or brush rather than blow dust away, and consider a respirator when sanding.
- Power carving — rotary carving tools are a separate hazard class: treat them as power tools, with machine guarding (29 CFR 1910.212), eye protection, and hearing protection where noise is high (29 CFR 1910.95).
- Age — carving knives are genuinely sharp; this is generally a teen-to-adult activity, and younger participants should carve with close supervision, instruction, and simple projects.
People with hand strain can try larger handles, lighter woods, shorter sessions, pre-cut blanks, or clamping the work instead of gripping it tightly.
Where It Can Go
Wood carving can lead toward whittling, spoon carving, relief carving, chip carving, figure carving, wood engraving and lettering, green woodworking, sculpture, instrument decoration, furniture details, or power carving. Exhibitions and shows run by carving associations are a common way to see work at different levels, and selling small carved objects is a realistic side route for people who enjoy the work.
References
Last reviewed: 17 August 2026.
Official safety sources:
- OSHA: Woodworking — the official safety entry point for woodworking hazards.
- OSHA: Woodworking — Hazards and Solutions — common injuries (laceration, amputation, severed fingers, blindness) and health hazards (wood dust, finishing chemicals), with references to OSHA’s hand and power tools and PPE publications.
- OSHA: Personal Protective Equipment — the general PPE requirements (eye/face, hand, respiratory) that apply to carving.
- OSHA 1910.133: Eye and face protection — when eye and face protection is required against flying particles such as chips and shavings.
Related Hobbies
Woodworking, wood burning, drawing, model making, pottery, leatherworking, stained glass, and printmaking all sit nearby — they share material awareness, careful hand control, and finishing work.